A place where one woman has gathered resources and information to help her family survive in an uncertain future; together with occasional personal musings.

Sunday, August 23, 2009

Articles related to Food Security

Here is the first in what I hope will be a long series of articles that contain useful information. I am going to post them as I collect them and organize them later into the section on knowledge and skills. This one is on gardening in old tires; which would eventually go under whatever subheading I give to the intersection of knowledge and skills and food security.


Creating a Tire Garden

There are mountains of old tires out there. Americans keep on rolling and tires keep on wearing out. Every year there is almost one scrap tire created for every man, woman, and child in the United States. In 2001 alone, Americans discarded nearly 281 million tires, weighing some 5.7 million tons. All of those old treads can provide a lot of good growing space, and we’re just the folks to put them to use.

There is no appreciable risk in using recycled tires in the vegetable garden. While it is a fact that rubber tires do contain minute amounts of certain heavy metals, the compounds are tightly bonded within the actual rubber compound and do not leach into the soil. One of the ingredients in the rubber recipe is zinc. Zinc, in fact, is an essential plant element. I also expect that rubber is safer to use than treated lumber that contains copper and arsenic. Tires are durable. The very qualities that make them an environmental headache make them perfect for our uses in the garden. Once they are in place, they won’t rot and will likely be there for your grandchildren to use.

Let’s take a look at some ways to recycle old tires and literally reap the benefits. Gardening with recycled tires has many benefits besides those directly with the garden itself. It puts to use an article that might otherwise end up in a landfill or other disposal site. Those of us who are into “growing our own” are often on the lookout for ways to increase production with a minimum of effort. Gardening with tires presents several good ways to do just that, while at the same time helping to recycle the old treads from our automobiles and other wheeled conveyances. Stop by your local service station, recycle center, or tire retailer and ask them to save some tires for you. Currently, dealers charge $2 or more to dispose of used tires. Since they charge the consumer to take the old tires and have to pay to have them disposed of, they will likely be happy to let you have all you want. Most tire centers will have a stack of old tires out back that they will give you permission to root through.

A rubberized hotbed

As winter’s icy grasp finally begins to slip, the homesteader who has not kept a little something growing all winter is surely thinking about getting a few seeds stuck into the ground. After a long winter of dried, canned, frozen, or store-bought fresh vegetables, a mess of fresh veggies would taste mighty good. One of the easiest and earliest ways to get those first lettuce and spinach salads growing is to use an old method that has been common practice around these parts for generations.

Folks around here often get those first salad greens going in a planter made from an old tire. For my own planter, I utilized the old tread from a log skidder to give me plenty of size and depth. For a project of this type, I’d recommend a fairly large one, such as a rear tire off of a farm tractor or from a log skidder like I used.

Tires newly planted with spinach seed in the fall greenhouse.

After laying the tire at the spot where I wanted it, I used a utility knife to cut the sidewall completely out of the upper side. This was fairly easy to do, and nearly doubled the planting area available. But do it carefully, and consider using some leather gloves as protection against the knife blade.

Once I removed the sidewall, I filled the tire with some good compost on top of a six-inch layer of fresh manure and seeded my lettuce and spinach. The heat generated by the manure’s decomposition helped to heat the seedbed from below. The whole thing was covered with some old storm windows obtained for the purpose by some creative scrounging. The result was a fine durable hot bed and the only cost involved was for the seed.

Raising the roots

One of the best ways to grow vegetables, especially in cool climates, is to grow them in raised beds. Let’s look at some of the benefits of raised bed gardening and how the method is a great way to use old tires:

  • When the soil is elevated, it warms faster. Raised bed gardens can increase spring soil temperatures by 8 to 13° F over the adjacent soil temperatures at ground level. The black, heat-absorbing tires compound the warming effect.
  • It dries out more quickly. These rubberized raised beds are helpful in improving water drainage in heavy clay soils or in low-lying areas. The soil is more exposed, and sun and wind help to dry and warm the soil more quickly.
  • It provides deeper soil for root crops to develop.
  • You can plant earlier in the season and get your plants off to a healthier and earlier start. This is especially true in cooler climates where spring rains often keep vegetable garden soil wet and cold. In containers such as our tires, excess moisture tends to drain away more quickly and the soil remains warmer, thus allowing for earlier planting.
  • You can harvest later into the fall.
  • Because of the longer growing season, you have the possibility of growing a wider range of vegetables.
  • Using these beds, you can concentrate a greater number of plants in a smaller area. This will result in less weeding and greater production.
  • Finally, and not insignificantly, raised bed gardening puts plants and soil back into the reach of older gardeners or others who cannot do a lot of bending as required with an ordinary garden.

In the greenhouse

Here is one way we have used tires in our own small greenhouse. Along the front wall we placed short stacks of tires and filled them with sand. The dark color of the tires serves to absorb heat, and the sand contained in each stack helps to store it. Atop each stack was placed another tire with the upper sidewall removed as already described.The top tire was then filled with compost and soil

then seeded in lettuce, spinach, or whatever.

We’ve also found that, in the greenhouse, they make a fine planter for an extra-early or late tomato plant. Since our greenhouse is attached to my garage and shop, I utilized an existing window opening, the woodstove in the garage, a window fan, and a timer to add heat to it. Between our tire planter, keeping a fire going in the garage—which I often do anyway—and timing the fan to turn on as the day begins to cool, we have been able to pick the last tomato off of the vine on Christmas Eve.

Jump start your tomatoes

By the same token, you can get a jump on the spring growing season by creating a mini-greenhouse, of sorts, for a few tomato plants. Once you have a stack or two of tires in place, set your tomato plants in each stack. Next, place a wire hoop or tomato cage in place around the plant. Cover the cage with clear plastic and secure it with duct tape, twine, etc. If you have them available, you can place an old windowpane over the top of this tomato tower. The combination of the black rubber tires and the clear plastic “greenhouse” will cause the plant to grow quickly.

You will need to monitor the heat and health of the young plants carefully to make sure they aren’t getting too much of a good thing. Once the plant is really growing and the chance of frost is past, simply remove the plastic and allow the plant to use the wire cage to support its branches, which will soon be laden with fruit.

You can add months to your growing season using this method alone.

Tire compost bin

Used tires can also be made into a good compost bin. Begin with a half dozen or so tires as large as you can handle. Large truck tires work well. Cut the sidewalls out of both sides using the sharp utility knife. You will end up with rubber rings of tire treads. After you have several of the hoops made, place one on the spot where you want your bin to be located. Be sure to turn the soil on the spot where you place the bin. This better exposes the composting material to the bacteria, earthworms, and other compost builders. As you fill the first tire hoop, merely place another atop it and fill it. Repeat the process until you have them stacked five or six high. You can keep filling tires with garden and kitchen scraps and other compost fixin’s or just start another pile.

After the compost has worked for several weeks, remove the top hoop and place it on the ground beside the original bin. Fork the top layer of composting material into this hoop. Remove the next hoop and place it atop the one on the ground and move the plant material into it. Repeat until you have the whole compost heap turned and transferred into the restacked hoops, one at a time. Note that in the process you have completely turned the working compost pile from top to bottom, perfect for producing good compost in record time. After several more weeks, the compost should be getting that good earthy smell and will be ready to use.

Potato stacks

When I was a youngster, I used a hoe to ridge up rows and rows of potatoes, pulling the soil up around the plants to help increase their yield. I have since learned of an easier way to grow potatoes that doesn’t require any hoeing—just plant a vertical potato patch. If you are limited in space, then this method is especially beneficial. You can grow a nice crop of spuds in just a few tires. Here’s how:

Generally, a stack of four or five tires that are progressively filled with some good compost and a couple of pounds of seed potatoes will produce around 25 pounds of potatoes. A few of these stacks can provide your winter’s supply of potatoes with no problem.

Use a utility knife to cut the sidewall completely out of the upper side.

To begin, pick a spot that is out of the way and perhaps out of sight where you can stack your tires. Loosen the soil just enough to allow for some drainage and place the first tire. Fill it with soil, being sure to fill the inside of the tire casing as well. Take your seed potatoes and cut them into pieces that have at least two “eyes,” or sprout buds in each piece. It doesn’t hurt to let each piece dry for a day or two before planting it. Plant three or four cut potato sets into the soil in the tire center. Cover the sets with enough soil to bring it level with the top of the opening.

Once the new potato plants get to be about eight inches tall, add another tire and add soil around the plants until just a couple of inches of the tops are above the soil. Repeat this process for the third and subsequent tires. As you add tires and soil to the ‘tater stack, the plant stalk is covered with soil. As you do this, the existing stalk will send off roots as well as grow upward to once again find the sunlight it needs. Since you are gradually raising the soil level eight inches or so at a time, the plant is able to keep growing without suffocating. At the same time, you are creating a 24- to 36-inch tap root off of which many lateral roots will develop. Each of the lateral roots can produce additional potatoes at three or four levels instead of only one. When you water the plant, be sure that the soil is thoroughly moistened all the way down to the base of the pile.

Since the tires also act as an insulator and heat sink for your potatoes, the added warmth will stimulate the lateral roots to multiply more quickly, giving you more potatoes. To harvest your crop, wait until the top dries up and begin to remove the tires, working your way down the stack and harvesting the potatoes as you go.


Stocking a Long-term Emergency Food Supply

One approach to long term food storage is to store bulk staples along with a variety of canned and dried foods.

Bulk Staples

Wheat, corn, beans and salt can be purchased in bulk quantities fairly inexpensively and have nearly unlimited shelf life. If necessary, you could survive for years on small daily amounts of these staples. The following amounts are suggested per adult, per year:

ItemAmount*
Wheat240 pounds
Powdered Milk75 pounds
Corn240 pounds
Iodized Salt5 pounds
Soybeans120 pounds
Fats and Oil20 pounds**
Vitamin C***180 grams
* Best to buy in nitrogen-packed cans
** 1 gallon equals 7 pounds
*** Rotate every two years

Stocking Foods for Infants

Special attention would need to be paid to stocking supplies of foods for infants. Powdered formula would be the least expensive form of infant formula to stock. Commercially canned liquid formula concentrate and ready-to-feed formula may also be stored. Amounts needed would vary, depending on the age of the infant. Infant formula has expiration dates on the packages and should not be used past the expiration date. Parents should also plan to have a variety of infant cereals and baby foods on hand. Amounts needed will vary depending on the age of the infant.

Other Foods to Supplement Your Bulk Staples

You can supplement bulk staples which offer a limited menu with commercially packed air-dried or freeze-dried foods, packaged mixes and other supermarket goods. Canned meats are a good selection. Rice and varieties of beans are nutritious and long-lasting. Ready-to-eat cereals, pasta mixes, rice mixes, dried fruits, etc. can also be included to add variety to your menus. Packaged convenience mixes that only need water and require short cooking times are good options because they are easy to prepare. The more of these products you include, the more expensive your stockpile will be.

The following is an easy approach to long-term food storage:

  1. Buy a supply of the bulk staples listed previously.
  2. Build up your everyday stock of canned goods until you have a two-week to one-month surplus. Rotate it periodically to maintain a supply of common foods that will not require special preparation, water or cooking.
  3. From a sporting or camping equipment store, buy commercially packaged, freeze-dried or air-dried foods. Although costly, this is an excellent form of stored meat, so buy accordingly. (Canned meats are also options.) Another option is to purchase dry, packaged mixes from the supermarket.
Consider stocking some of the items listed as examples below. Amounts are suggested quantities for an adult for one year.

Flour, White Enriched17 lbs
Corn Meal42 lbs
Pasta (Spaghetti/Macaroni)42 lbs
Beans (dry)25 lbs
Beans, Lima (dry)1 lb
Peas, Split (dry)1 lb
Lentils (dry)1 lb
Dry Soup Mix5 lbs
Peanut Butter4 lbs
Dry Yeast1/2 lb
Sugar, White Granulated40 lbs
Soda1 lb
Baking Powder1 lb
Vinegar1/2 gal

Storage and Preparation of Food Supplies

All dry ingredients or supplies should be stored off the floor in clean, dry, dark places away from any source of moisture. Foods will maintain quality longer if extreme changes in temperature and exposure to light are avoided.

Grains

If you purchase bulk wheat, dark hard winter or dark hard spring wheat are good selections. Wheat should be #2 grade or better with a protein content from 12 - 15% and moisture content less than 10%. If wheat is not already in nitrogen-packed cans, it can be stored in sturdy 5 gallon food-grade plastic buckets or containers with tight fitting lids. If the wheat has not already been treated to prevent insects from hatching, wheat may be treated at the time of storage by placing one-fourth pound of dry ice per 5 gallon container in the bottom and then filling with wheat. Cover the wheat with the lid, but not tightly, for five or six hours before tightening the lid to be air tight. Other grains to consider storing include rye, rice, oats, triticale, barley and millet. Pasta products also satisfy the grain component of the diet. Milled rice will maintain its quality longer in storage than will brown rice. Many of the grains may require grinding before use. Some health food stores sell hand-cranked grain mills or can tell you where you can get one. Make sure you buy one that can grind corn. If you are caught without a mill, you can grind your grain by filling a large can with whole grain one inch deep, holding the can on the ground between your feet and pounding the grain with a hard metal object such as a pipe.

Non-fat Dry Milk/Dairy Products

Store dry milk in a tightly covered air-tight container. Dry milk may be stored at 70oF for 12 - 24 months. If purchased in nitrogen packed cans, storage time for best quality will be 24 months. Other dairy products for long term storage may include canned evaporated milk, pasteurized cheese spreads and powdered cheese.

Other Foods or Ingredients

Iodized salt should be selected and stored in its original package. Dried beans, peas, lentils, etc. provide an inexpensive alternative to meat and are easy to store in glass or plastic containers tightly covered. Those purchased from the grocery shelf are normally the highest quality.

Open food boxes or cans carefully so that you can close them tightly after each use. Wrap cookies and crackers in plastic bags, and keep them in air-tight storage containers. Empty opened packages of sugar, dried fruits and nuts into screw-top jars or airtight food storage containers to protect them from pests. Inspect all food containers for signs of spoilage before use. Commercially canned foods are safe to eat after long periods of storage unless they are bulging, leaking or badly rusted. Quality, however, will diminish with long term storage. Changes in flavor, color and texture may be observed and nutritional value will decrease. For best quality, use within one year. If stored longer than one year, rotate canned goods at least every two to four years.

Vitamin and Mineral Supplements

To help compensate for possible deficiencies in the diet in emergency situations, families may wish to store 365 multi-vitamin/mineral tablets per person. Careful attention should be paid to expiration dates on packages.

Shelf Life of Foods for Storage (Unopened)

Here are some general guidelines for rotating common emergency foods to ensure the best quality of the products.

  • Use within six months:
    • Powdered milk (boxed)
    • Dried fruit (in metal container)
    • Dry, crisp crackers (in metal container)
    • Potatoes

  • Use within one year:
    • Canned condensed meat and vegetable soups
    • Canned fruits, fruit juices and vegetables
    • Ready-to-eat cereals and uncooked instant cereals (in metal containers)
    • Peanut butter
    • Jelly
    • Hard candy, chocolate bars and canned nuts

  • May be stored indefinitely* (in proper containers and conditions):
    • Wheat
    • Vegetable oils
    • Corn
    • Baking powder
    • Soybeans
    • Instant coffee, tea
    • Cocoa
    • Salt
    • Noncarbonated soft drinks
    • White rice
    • Bouillon products
    • Dry pasta
    • Vitamin C
    • Powdered milk (in nitrogen-packed cans)
*Two to three years

If the Electricity Goes Off...

FIRST, use perishable food and foods from the refrigerator. THEN use the foods from the freezer. To minimize the number of times you open the freezer door, post a list of freezer contents on it. In a well-filled, well-insulated freezer, foods will usually still have ice crystals in their centers. Consume the foods only if they have ice crystals remaining or if the temperature of the freezer has remained at 40 degrees F or below. Covering the freezer with blankets will help to hold in cold. Be sure to pin blankets back so that the air vent is not covered. FINALLY, begin to use non-perishable foods and staples.

References:

  1. Federal Emergency Management Agency. June 16, 1998 Update. Emergency Food and Water Supplies (FEMA-215). Washington, DC.
  2. Church of Jesus Christ of Latter-Day Saints. 1998. Emergency Preparedness Manual.

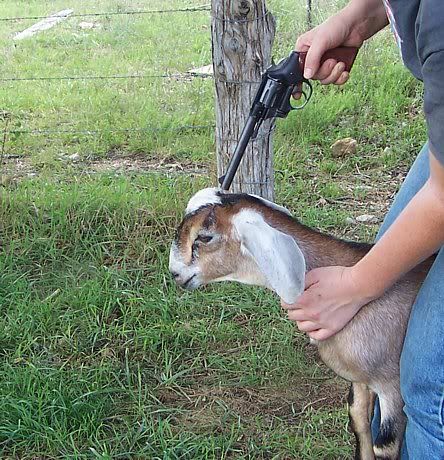
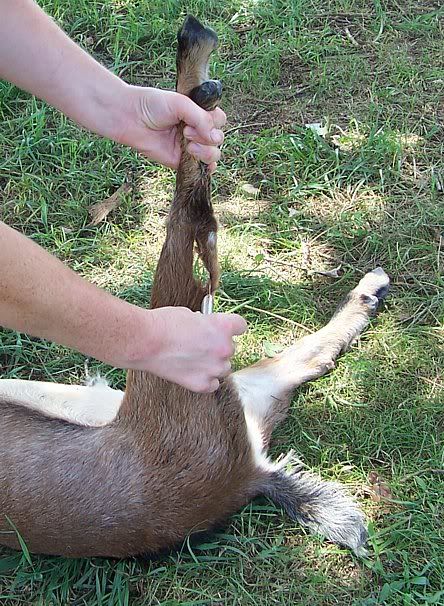
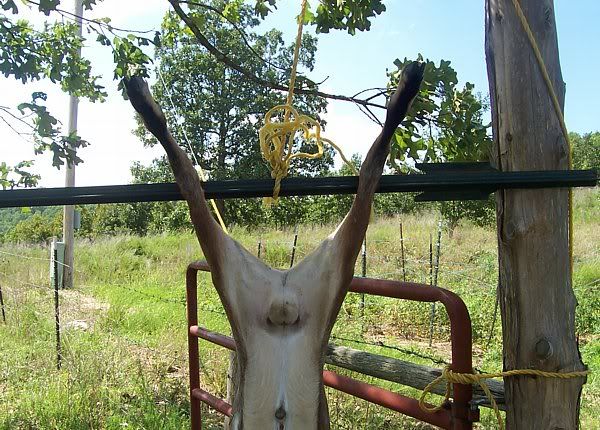
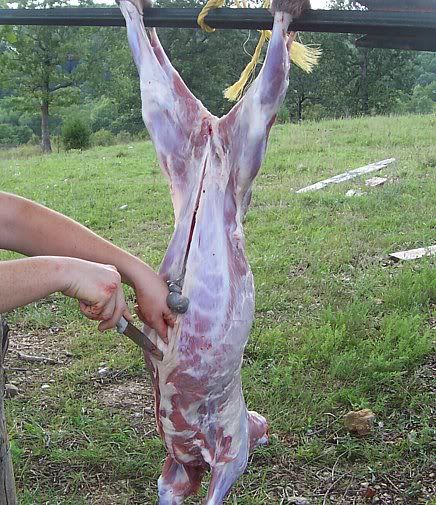
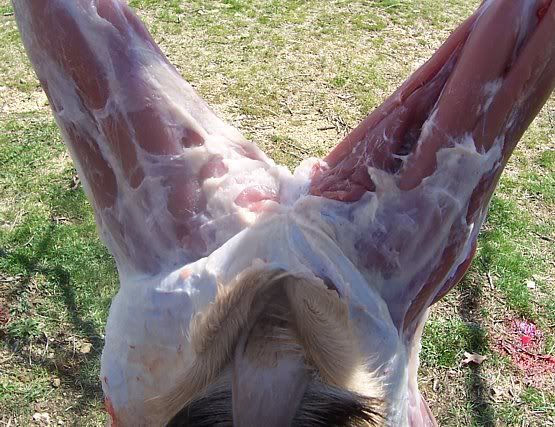
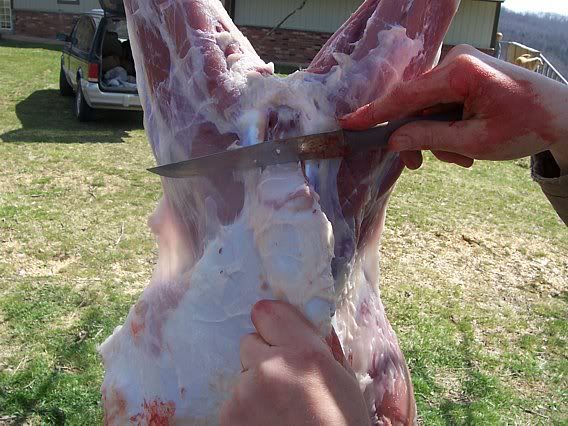
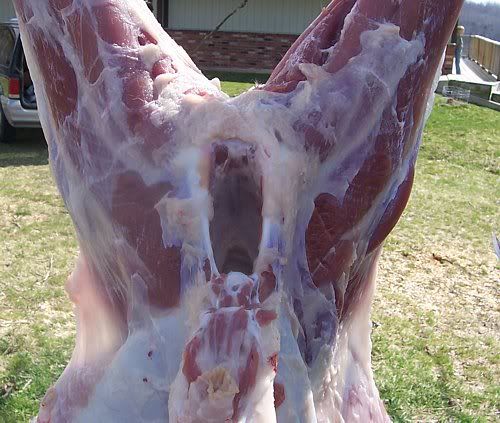
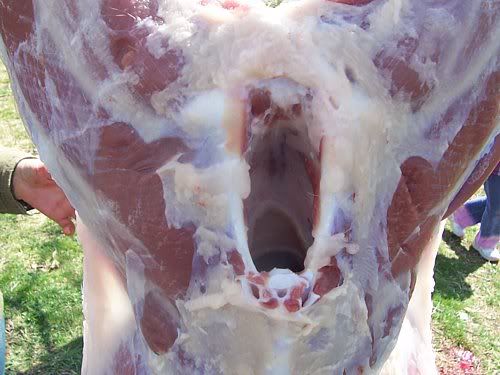
    Slaughtering and Butchering

    By Dynah Geissal


    Fall is butchering time, a period of joy in the harvest of the year’s work and of sadness that the lives of your beautiful, healthy animals have come to an end. On this occasion the animals should be treated with the same kindness and respect with which they were treated during their lives. Good farmers raise their animals free from fear, anxiety and stress. The animals should meet their end as they lived, without the terror of the slaughterhouse.

    Making careful preparations will help you remain calm. After years and years of butchering I still feel a strong adrenaline rush when the animal is killed. Be prepared for that and use it to make sure the death is as painless as possible. A knowledgeable person can direct these strong feelings into doing the job right instead of letting their emotions get the best of them and botching the job. When the temperature only reaches 40° during the day and the pasture is no longer adequate feed, it is time to butcher. Sheep and goats should be nine months or under. Pigs should be just slightly jowly.

    Past wisdom dictated that 250 pounds was optimum butchering weight for a pig, but after your porkers reach 225, the ratio of weight gain going to fat versus lean meat increases dramatically. After many years of experimentation, I try for 200 pounds. At that point my pigs have no more of a fat covering than my goats. There’s still enough fat for lard and sausage, but there’s no reason to pour more and more feed into them only to find their kidneys so imbedded in fat that they’re hard to locate. I buy my pigs in early May and by mid-November they are eating so voraciously that I know it can no longer be practical to keep them.

    Figure 1.  Cutting around the foot.Figure 1. Cutting around the foot.

    Calves are traditionally kept until they are 10-15 months old, but that can be a problem for a family raising their own meat. If the calf was born in February it could be butchered in December. In a place like Montana, however, December is late for butchering. With the temperatures around 0°, your meat would have to hang a very long time to age.

    If you decided to keep the calf till spring, you would be faced with deciding whether to butcher it after feeding all winter or to let it grow some on the pasture.

    By the time the calf is looking really big, it’s midsummer. In a cool climate you could butcher it then if you did it fast, but you would have to pay someone to hang it to age. In most climates, you don’t butcher between May and October anyway, if you can help it, because of the fly problem. So then you’re up to fall when you have all the other butchering to do. If you can manage it, I think that is your best option.

    Here are a few additional suggestions to think about ahead of time. Butchering pigs and cows is easier if you withhold food for 24 hours before butchering. This is not totally necessary, and if you would feel bad having your animal hungry on its last day, don’t do it. Just be extra careful with the guts.

    When you butcher only certain members of a herd, avoid frightening the others. Don’t run through the herd chasing the one you want. Move slowly and calmly. Try not to kill one animal in front of the others. Don’t slaughter in the animal’s home.

    Figure 2.  Cutting down the body.Figure 2. Cutting down the body.

    The exception to this is when you are slaughtering pigs. Swine do not care if you kill their companion and will rush over to drink the blood if they can.

    It makes sense to leave the pig butchering until last so that they can consume anything that is left over. Don’t feed surplus fat to pigs, though. Only poultry can convert fat into useable production calories. That is because of their high rate of metabolism. If you feed fat to pigs, it will provide calories, but it can only become fat, not meat.

    Before butchering, decide what parts you will save. I think I’ve tried saving just about everything, and I think there’s some value in that. However, if no one wants to eat it, the value is only in learning and experimenting and knowing the possibilities.

    There is a certain satisfaction in using everything. Ears and tail can flavor a pot of beans. Hooves can make gelatin. Stomachs can hold blood sausage and other things. Lungs are edible. Intestines can be used to make sausage casings or cooked in some other additional dishes. I will describe what I keep, but feel free to make your own decisions about what you and your family would like to try.

    A word about using the intestines for sausage. If the situation is such that you have running water in a hose, it is fairly easy to clean them. Otherwise you’ll have to do it indoors, which is a lot of work. After that you have to turn them inside out and scrape them.

    If you don’t scrape them, they’ll still be edible but they’ll be tougher than you might like. These days I feed the intestines to the animals and buy prepared ones. If you buy them from a butcher house, they’re already prepared and quite inexpensive. Try not to buy them in the grocery store, as they demand ridiculous prices.

    Be sure to save enough fat for lard, sausage making, and if you’re butchering a cow, for ground beef.

    A goat is shot in the back of the head. The front is too hard. With a cow or a pig, mentally draw lines from the top of each ear to the opposite eye. Where the lines cross is where you shoot. One shot with a .22 should do it.

    Figure 3.  Skinning from the center.Figure 3. Skinning from the center.

    We shoot pigs in their pen. That is the least traumatic for everyone. If you do this, though, you’ll want to get the pig out of the pen as quickly as possible so as to slit the throat on clean ground. Throw a noose around its neck and drag it out. You want to slit the throat while the heart is still beating in order to get all the blood pumped out.

    Stick the point of your big knife into the throat and cut outward through the skin. Never try to cut into the skin through the hair. Make sure you’ve severed the main veins and arteries.

    Any male animal that is to be used as food should have been castrated. If that wasn’t done, however, remove the head and testicles right away. That’s easy with a goat, but a cow or pig can kick with a real wallop, so be careful. This is done so the meat won’t be tainted.

    If you are butchering a pig, you will want to wash it down now. A pig is a clean animal in a natural environment but gets pretty dirty when confined. Be especially careful in cleaning the rear feet, for they’ll stay on unskinned.

    Remove the head by cutting all the way around with your big knife. As always, avoid cutting into the hair. Instead keep your knife between the flesh and the skin and cut out. With a goat, twist the head until the bone snaps. With a pig or cow, use your meat saw.

    Make slits between the achilles tendon and the ankles and insert the gambrel. At this point, you could scald a pig but in these days of preserving meat by freezing, there’s really no point. In days past, the skin was left on the bacon and hams to protect them. It’s traditional, but there’s no other reason to leave it on since we don’t eat it anyway. And logistically it’s just much simpler to skin. Remove front feet at the joint. Using a pulley for a goat and a come-along for a pig or cow, hoist the animal into the air to a height convenient for working on the rear of the animal.

    Slip your short pointed knife (Figure 1) into the slit you made at the achilles tendon and cut around the foot, again cutting out, not in. Be very careful not to cut the tendon. With the knife between the flesh and the skin, slice a line through the skin down each leg to the centerline. Then cut down the body to the neck (Figure 2).

    Figure 4.  Skinning the foreleg.Figure 4. Skinning the foreleg.

    Now take your skinning knife and begin skinning at the junction where the leg cuts meet the centerline. Hold the skin with one hand or your hook and pull hard to create tension as you use your knife to separate the flesh from the skin. Work out from the center (Figure 3).

    If you are not going to use the hide, you won’t have to worry about keeping it intact. Just be concerned about the meat in that case. You’ll have to be much more careful if you want to use the hide.

    Keep pulling the skin away with your hand or the hook and continue to slice between the hide and the flesh until the belly is skinned. This will relieve the tension of the skin on the rump. Now work around the leg from front to back.

    The next step is to start at the top of the “Y” and skin up and over the crotch. The skin is tightest here, so be especially careful if you’re saving the hide. Pull skin out and down to create tension on your work while you slice with your knife. A layer of fat makes the animal relatively easy to skin. Leave as much fat on the body as possible.

    Work over the anus to the tailbone. Give the tail a sharp jerk and it will separate from the vertebrae. From here on, the weight of the skin practically skins the animal for you. Work all around the body. If there is too much movement on the gambrel, lean against the animal.

    Raise the beast when it becomes difficult to reach your work. Bring the work to you and stay comfortable. The forelegs are a bit difficult near the shoulders. Start on the outside of the leg (Figure 4). Work around to the front. Skin the neck and the inner forelegs and shed the skin.

    Lower the animal so that you can comfortably work on the rear of it. At this point you want to separate the large intestine from the body. You will begin by cutting around the anus with your short pointed knife. Be careful not to make any holes in the intestine. When it is cut free, pull it slightly out and tie it off. It is helpful to have a partner here. This step (tying) is unnecessary if you are butchering a goat.

    Figure 5.  Cutting down the belly.Figure 5. Cutting down the belly.

    Cut down the belly with your pointed knife. Cut from inside out as before. With your other hand hold the guts away from the point of the knife (Figure 5). Cut through the belly fat all the way down to the sternum. Next, cut the meat between the legs.

    If the animal is a male, cut out the penis. Place a large container underneath to catch the guts. By now they will be bulging out of the body. At some point if you are butchering a ruminant, there may be a flow of greenish liquid from the neck. This is just the cud and nothing to worry about.

    Cut through the fat surrounding the guts, then sever any tissue connecting them to the rear wall of the body cavity. Pull the anus through to the inside and then out. Separating the intestines from the body is tedious, so take your time. You don’t want to spill the contents into the meat.

    Be careful also not to rupture the bladder. Some people tie it and then cut it off, but I’ve found that method to be more likely to cause spillage.

    Pull the intestines and bladder out of the body. Most of the stomach will also be free now. You will need to reach in and under to lift it all over the sternum. Some people cut through the sternum, but it’s easy enough just to lift the guts out. Most everything will now be hanging out of the body. Strip away as much of the surrounding belly fat as you can to feed to the chickens. Get out the bowl for the innards you want to keep. Remove the kidneys and fat. Cut out the liver and put it into the keeper bowl along with the kidneys. Sever the remaining flesh connecting the stomachs to the body, and it should all fall into the gut bucket.

    Figure 6.  A goat ready to cut up.Figure 6. A goat ready to cut up.

    Cut out the diaphragm and remove the lungs and heart by severing the connective tissue behind them. Separate the heart from the lungs and squeeze out the blood from the heart. The heart is a keeper, while the lungs aren’t.

    From the neck end, cut out the windpipe. Be sure the opening is clear all the way through the body cavity. Clean all over with cold water. (Now you see that if you hadn’t cleaned those rear feet of a pig, the dirt from them could contaminate the meat.)

    Except for pork, we age all our meat from fowl to cow, and strongly advise you to do the same. Pork should only hang overnight to chill, and all meat should be cut up in a chilled state. A goat should age one week in 40° weather, longer in colder weather. If it’s too warm to age it, it’s a real shame to butcher at that time, because the meat won’t be as tender as it could be. A goat is hung whole.

    To halve a larger carcass, face the belly while your partner helps hold the body and helps to guide the saw from the back when necessary. Use your fingertips on the blade to guide your cut. A cow should be quartered for ease of handling, of course, but also to allow the meat to cool as quickly as possible. Merely cut between the 2nd and 3rd ribs and be ready to hold the fore section. It should be hung for two weeks under the proper conditions.

    When you’re finished working on the animal’s body, it’s time to salvage the tongue and brains from the head. The easiest way to get the tongue is to cut under the jaw in the soft space in the middle. When you have slit this open, reach in and cut the tongue loose from its mooring. Working through the mouth is much harder.

    Chopping the skull with an axe works for getting out the brains, but sawing it in half with your meat saw gets the job done with a bit more finesse. If you plan to use the rest of the head, you will have to skin it now. Remove the ears, eyes, nose and anything that doesn’t look like meat or bone. Clean thoroughly. You may want to brush the teeth. You could make goat’s head soup or you could make headcheese. The only heads I use these days are pigs.

    Some people use the jowls for bacon, but if you’ve butchered before the pig has gotten really fat, there won’t be much there. I use the head meat for scrapple, tamale meat and pozole. I used to use some in liverwurst, but we prefer these other dishes.

    In any case, you’ll need a pot large enough to hold the head. If you cook with a wood stove as I do, just add water to cover, put a lid on and leave it on the stove to simmer until the meat is tender. It’s less convenient if you use some other kind of fuel.

    Figure 7.  Separating the rear third of a pig.Figure 7. Separating the rear third of a pig.

    Remove the meat and bones from the pot and separate them. Take out anything that looks strange and you’re ready to use whatever recipes you’ve decided on. Boil down your broth to a manageable amount and either use it in your recipes or freeze it for later use.

    When you are ready to cut up your meat, refer to the section that applies to your animal. Cutting up a deer or a sheep is the same as a goat.

    Cutting up a goat

    Cut behind the shoulder blades to remove the front legs. Cut off leg at elbow. These lower legs can be soup bones, but they’re not much good for anything else. You can package the shoulder as it is or you can bone it, roll and tie for a rolled roast. You could also cut it up for stew meat. Take as much meat from the neck as you can. Use that for soup.

    You could cut chops if you wanted. You would have to saw through the backbone between every rib to do that. You could bone out the chops to avoid all the sawing. Or you could just cut out the whole muscle bundle along the backbone. It’s called the backscrap and is the best meat on the animal (that’s what I do).

    Figure 8.  Separating the front third of a pig.Figure 8. Separating the front third of a pig.

    Next take your meat saw and cut the ribs from the backbone. Then cut them in half with your knife for easy packaging. Underneath the backbone is the tenderloin. Cut that out.

    Now for the rear third. Cut off the foot. Next cut off the leg at the knee. These are your shanks. Separate the legs at the pelvis. These are the only roasts I keep from a goat. I use the front shoulders for stew or stir fry. You can package the leg as it is or bone it. Boning saves a lot of space and a rolled roast is a pleasure to cut when it’s cooked, too.

    That’s it except for working over all the bones to retrieve any last bits of meat for your sausage bucket. I save one goat just for sausage and one for jerky. You may want to do that, or you may have other favorite uses. Goat meat (or chevon as it’s called) is really wonderful when it’s properly handled.

    Cutting up a pig

    There are many ways to cut up a pig and many ways to cure meat. I’m going to tell you how I do it and why I use this method. If you’re doing your own curing, you have the vagaries of weather to contend with. Below freezing and it doesn’t cure. Fifty degrees and it spoils.

    In my first experiments I used an old fashioned cure. It was very salty. The hams and bacon hung in a cool room all year and didn’t spoil. If you don’t have a freezer, you could do that.

    You can use a dry cure or a brine cure. In the brine cure, the strength of the brine is det ermined by the amount of meat. Theoretically it can’t get too salty that way, and I have found that to be true.

    If you butcher when it’s 40°, and then it warms up to the 50s, then it freezes for a while, then warms up to 50° again, there’s a real danger that your meat will sour around the bone. By the time it’s in the warm smokehouse, you’ve really got trouble. For this reason I bone the hams. I have never had a problem since I began doing this. Also it makes the ham nice to cut when it’s rolled and tied.

    Figure 9.  Separating the ribs from the chops.Figure 9. Separating the ribs from the chops.

    Your pig should have hung overnight so that the meat is firm. Now you will want to cut your side of pork into thirds. To do this take your meat saw and cut straight down from the backbone through the aitch bone to separate the rear ham from the body. (Blue tape, Figure 7.) The cut should go right through the ball and socket joint. Remove the foot.

    To separate the front third, cut between the second and third ribs again cutting straight down from the backbone. (Blue tape, Figure 8.) Look carefully at the muscle bundles and try to keep them intact.

    Take the middle section and make another cut after the 11th rib. Then cut across the ribs parallel to the backbone to separate the ribs from the chops. (Blue tape, Figure 9.) Look at both ends of the meat to see where to cut. Remove the belly fat and save it for sausage and lard.

    Saw through the backbone for chops and finish your cuts with a knife. It’s helpful to have a partner to hold it steady. Trim off the extra fat but as always, leave some.

    Now trim out the loin. Feel the bone with your fingers and just cut out the muscle bundle as well as you can. This is your best roast. Cut it into whatever size you want (Figure 10).

    Figure 10.  Rolled poark roasts and the bone they came from.Figure 10. Rolled poark roasts and the bone they came from.

    Trim the excess fat from the ribs. Decide whether you want extra meaty ribs or if you want to slice off most of the meat for bacon. Cut the bacon from the ribs (Figure 11). Cut the ribs into easily packaged pieces, but leave the bacon whole until after smoking (Figure 12).

    Before cutting your hams, you’ll have to decide whether you want them large or small and how much meat you want for sausage, stir fry, etc. Cutting hams and roasts takes some practice, but don’t worry too much. They can always be trimmed to look nice and nothing is wasted. It can always go into the sausage bucket.

    Begin two piles of trimmings. One will be for sausage and the other will be better pieces for stir fry. Take the front third and cut off the hock. If you wanted to make this a shoulder roast you could, but the meat is very fatty and not as good quality as the rear. It could also be used for sausage or stir fry. When you make your roasts, study the muscle bundles and try to keep them intact as much as possible. To bone, cut to the bone and cut around it as well as possible and along the backbone to the third rib. Cut off the front muscle bundle and put it into the sausage bucket. Roll it up as it would be with the bone in and trim it to look nice. Trim off excess fat.

    Take the rear third and decide how much hock you want and cut that off. Bone out the rear hams and trim off excess fat. This is tedious, so just take your time. Make your cut in to the bone and cut it out as well as possible. Trim end for looks (Figure 13).

    Figure 11.  The bacon separated from the ribs.Figure 11. The bacon separated from the ribs.

    Put your bacon, hams and hocks into the curing bucket. Be sure to save enough fat for sausage and lard, and you’re finished with this part.

    Cutting up a cow

    Begin with the hind quarter. Cut off the leg by making a cut with the meat saw from the hip to the tailbone. If you cut across the top, you will have round steaks. The first cuts are top round and are the best. Thicker cuts make round roasts. The small, less meaty part near the shank is the heel of round. The shank is a soup bone.

    The muscle flap on the belly is the flank steak. Cut that off and remove the layers of fat. The rump roast is the meaty end that was cut away from the leg. Bone it out for a rump roast or just cut it off with the saw.

    Figure 12. A pig cut up but not yet boned (front)Figure 12. A pig cut up but not yet boned (front)

    The top muscle on the remaining piece is all steak. You could cut through the backbone for each steak or bone it out and then cut into steaks. Or the part behind the ribs could be left whole for a sirloin roast. The meat underneath the backbone is the tenderloin or filet mignon which can be removed and cut into steaks (butterfly) or left whole.

    Your steaks, beginning at the rear just ahead of the rump roast and moving forward, are sirloin, porterhouse, T-bone, if boned, separate into the filet mignon and New York strip. The rib steaks could be left whole for a rib roast, which would be your best roast. Everything left on this quarter is stew or burger. Stew meat is the better meat. Remove the fat and anything un-meatlike.

    Now we’re ready for the front quarter. To remove the leg, lift it up and start cutting underneath until you have cut behind the shoulder blade and separated the leg from the body. The part on the shoulder is called a blade roast. It can be boned or just cut with the saw to the size you prefer. The top part of the leg is chuck and can be made into roasts or steaks. It can be boned or not. The lower part of the leg is burger or soup bone. There are probably a couple of rib steaks on the remaining piece, so cut these out. The neck meat is stew. The meat at the front that would have been just behind the leg is brisket. Remove that from its bone.

    Figure 13.  Roasts, hams, chops, bacon, ribs & sausage trimmings.Figure 13. Roasts, hams, chops, bacon, ribs & sausage trimmings.

    Cut as many ribs as you want for short ribs. Everything else is stew or burger. When making hamburger, use at least one fourth fat.

    Curing

    Mix the brine before you cut up your pork, so you can just drop it right in. Two five-gallon buckets of food grade plastic works fine for two pigs. The recipe is for 100 lbs. of meat which should also be right for two pigs. Measure out 8 pounds of pickling salt and 2 pounds of sugar, honey, brown sugar or maple syrup. This is the critical part. Dissolve this in water. We add other spices such as cayenne, black pepper, garlic, etc. but this is only for added flavor and not necessary. The use of boiling water aids in dissolution.

    Some people add saltpeter (nitrates), but all it does is make the meat a uniform pink, and I prefer not to use this additive. Bacon and hocks will cure in a week at 40°. Hams will take six weeks. For every day below freezing, another day should be added.

    Weight the meat so it doesn’t come above the brine, adding more water if necessary. Use a plate with a clean rock on top.

    Figure 14.  Cuts of meat from a pig.Figure 14. Cuts of meat from a pig.

    Sausage

    Any kind of meat can be used for sausage. Just save whatever scraps you have from cutting up meat. You can use as little as ¼ fat, but the sausage is much, much better if 1/3 is used. Sausage making is one of the most fun of all my projects. But don’t rush through it or it can turn into a nightmare. If you’ve just finished cutting up your pig, give yourself a break and wait until the next day to do the sausage.

    I have enclosed several recipes that you might like to try. We like to make many different kinds each year. Whatever you do though, take the time to cook some of each type before you package it or stuff it into casings. It may be too bland or worse too spicy, in which case you’ll have to add more meat.

    If sausage is being made from pork, only one grinding will suffice but beef or goat should be ground twice using a coarser grind the first time.

    Figure 15.  Cuts of meat from a cowFigure 15. Cuts of meat from a cow

    Some recipes call for water and some don’t, but if you’re making link sausage you will have to add some liquid. Add enough so that the sausage is easy to work.

    Smoking

    Hardwood must be used for smoking so that the meat doesn’t get resins in it, as it would from pine. When smoking hams, bacon and sausage, you use what is called a cool smoke. This means that the meat is not being cooked while it is being smoked. You can use anything to hold the meat and smoke. We built a smokehouse out of sheets of plywood, which enables us to walk inside to hang the meat.

    We use an old woodstove to provide the smoke, which passes from the stove through a stovepipe with damper into the smokehouse. The pipe should go in fairly low, but not so low as to inhibit draw. For an hour or so, leave the door ajar to let excess moisture escape. Then close it and try to keep the temperature around 100°. When it’s done is a judgement call, but we give sausage approximately 12 hours, bacon 14, and hams 48. The color is the key. It should be the color of mahogany.

    Recipes

    Scrapple: basic recipe

    By weight:
    4 parts meat (ground or chopped)
    3 parts broth
    1 part cereal

    Cornmeal is traditional, but oatmeal is sometimes used, as is buckwheat flour. Some people use half cornmeal and half buckwheat flour, while others substitute a little wheat germ for some of the cornmeal.

    If using cornmeal, add some cool broth first to keep the cornmeal from lumping up. Then cook with the rest of the broth and the meat until it begins to thicken. Stir often and don’t let it scorch. At this point add the seasoning. Use whatever you like and leave the rest. The amounts given below are about right for the meat from one head (or about 8 lbs):

    2 T salt
    2 T pepper
    1 T marjoram
    1 T sage
    1 t cayenne
    ½ T nutmeg
    Trace of mace
    2 T onion (ground or chopped)
    ½ t thyme
    1 bay leaf

    Pour into a lightly oiled loaf pan and chill. Turn out, cut to appropriate size, wrap and freeze. When ready to cook, slice and fry until brown outside but still soft inside. Scrapple is traditionally served with maple syrup.

    The cereal-to-broth ratio needs to be pretty constant, but you can use more or less meat.


    Pozole (poh-so-lay)

    Meat from 1 head, chopped (about 8 lbs)
    Broth to cover
    4 lbs hominy
    2 T salt
    4 T chili powder

    Cook 2 or 3 hours. When ready to eat, chop or shred cabbage, onions, and radishes and place in separate bowls.

    To serve, ladle soup into bowls and top with the desired raw vegetables. Squeeze lime juice over all.


    Tamales

    Take the head meat and add cumin, crushed garlic, chopped hot peppers to make a nice spicy mixture. Eat or freeze.

    Preparation: Traditionally, tamales are wrapped in corn husks. That’s fine if it’s summer (if they’re dry, soak them to make them pliable). If corn husks are not available, there are plenty of other wrappers to choose from. I go to the garden to see what’s available—cabbage leaves, chard, even lettuce. Even in the depths of winter I have something under straw that will do. The advantage is that the whole thing can be eaten.

    Make the outer covering of cornmeal (I like to use masa) with some lard worked in and then add some water (like making biscuits). Add some garlic, cumin and cayenne and spread onto the wrapper. Roll up and steam for about two hours and serve.


    Sausage: A few basic recipes

    As you can see, the amounts of the various seasonings are really arbitrary. Feel free to add more or less according to what you like. Salt is really a matter of preference if the sausage is going to be frozen. Most recipes call for 2 T to 6 T for 10 lbs, but I prefer to stick with 2 T. If you like variety, try several recipes, but if you just want to get it done, go for the recipe for 100 lbs. Pork, beef and chevon can all be used in sausage. Chevon can be substituted in any recipe calling for game or beef. For smoked sausage, increase salt to 2 lbs per 100 lbs meat and add 3-5% water, or enough to make the sausage easy to handle.

    Basic country sausage


    10 lbs meat
    2 T salt
    4 t sage
    4 t pepper

    or
    8 lbs meat
    2 T salt
    8 t sage
    4 t pepper
    1 t ground cloves
    2 t nutmeg, thyme or allspice

    or
    10 lbs meat
    ½ t marjoram
    1 t mustard
    2 T salt
    1 T pepper

    Spicier country sausage

    10 lbs meat
    2 T salt
    2½ t dry mustard
    5 t pepper
    2½ t cloves
    5 t cayenne
    6½ T sage
    or
    10 lbs meat
    2 T salt
    5 t pepper
    5 t fennel seed
    1 t cayenne
    2 t garlic
    or
    10 lbs meat
    2 T salt
    5 t marjoram
    5 t pepper
    1½ t garlic

    Basic sausage for quantity

    100 lbs meat
    1¾ lbs salt
    2-4 oz sage
    2-4 oz pepper
    ½ - 1 oz cayenne
    ½ - 1 oz cloves or 1 oz nutmeg


    When I decided to give butchering a try, I used a most humane method that I found on the web for slaughtering, and since I also had butchered chickens and the occasional deer, I just adapted what I already knew to fit butchering a goat. I have since butchered about 30 wethers, bucklings and cull does, and have been very satisfied with the results. My method is very simple, you need no "butchering equipment", and one person can do it alone if need be, although two people are handy to hang the carcass, and load up the offal.


    Now, I am not just writing this for those of us that raise "meat goats", because those extra little dairy wethers pack a truly surprising amount of meat too. About half or more of the wethers I butcher are dairy goat breeds. The meat is good no matter the breed. I have observed that the Nubians tend to carry a little more weight than the Lamanchas or Alpines, but all are satisfactory once in the pan. I get too attached to bottle kids and cannot butcher them, so if I plan on eating any dairy wethers, I leave them on their dams and touch them as little as possible. It is much harder to get attached to something that is wild. I butcher anywhere between the ages of 3 months to 1 year as a general rule, although I have butchered older goats too. The buckling pictured in the butchering photos was a 3-month-old Nubian.


    The equipment I use is a t-post, a rope, a handy tree limb, a .22 pistol if the goat is a young kid(if it is an older goat, a larger shot might be in order) a sharp knife (preferably bigger than a paring knife), and a wheelbarrow. Here is my method:


    Slaughtering and hanging: Shoot the goat through the back of the head, right behind the poll(or right behind the horns), angling the shot toward the lower jaw. (See Photo 1.)


    Photo One:


    Immediately slit the throat as close to the head as you can (not wanting to waste any of the neck meat) so the blood can drain. There will be a lot of blood, but that is good. (Note: To those of you who are not used to killing anything, there will usually be reflex movement of the head and legs at about this point. Don't let it un-nerve you, it is JUST reflex action. I usually rest my foot on one of the hind legs at this point to hold it still. The goat is NOT still alive, but it is a bit disconcerting the first few times.) Use your knife to make a slit in the skin between the tendon and the bone at the hock of both back legs. Don't cut through the tendon or you will have no way to hang the carcass. (See Photo 2.)


    Photo Two.


    Slide the t-Post through the slits in the back legs. Now run a rope over a tree branch about 2 feet out from the tree and tie one end to the middle of the t-post between the goat's legs. One person can pull on the other end of the rope while the other person lifts the goat up by the t-post till it is hanging at the desired level for skinning and gutting. Then tie the rope off to the tree. (See Photo 3.)


    Photo Three.


    Skinning and gutting: With the knife, finish cutting off the head until you get to the spine. When the only thing holding the head on the body is the spine, then twist the head until you hear a pop and the head will come off. Next, the knee joints: just cut and twist them like you did the head and the lower leg will come off. Now take your *sharp* knife, and gently slit the hide down the belly; I say gently because if you don't you might puncture the guts, which will get on the meat and taint the meat. Gently pulling on the hide with one hand and using the knife to separate hide from meat with the other, skin the entire goat. When you come to the tail and anal cavity, keep pulling the hide outward, and cut right through the anal canal that is pulled outwards with the hide, cutting through the tail, and continuing skinning down the back. When the hide is off (See Photo 4),


    Photo Four.


    I always position a wheelbarrow or tub beneath the goat so that the guts fall directly into it (that way there is no picking them up after I'm finished), and then I start the gutting process. First, use the tip of your knife to cut all around the outside of the anal canal until it comes loose and drops back into the body cavity. Then gently slit the stomach open (again, the key word is *gently*) and gut the goat. I like to use two fingers of my free hand to keep the stomach wall away from the guts as I slit down the stomach, to be sure not to puncture any of the organs. (See Photo 5.)


    Photo Five.


    I'm very careful not to cut open any of the stomach or digestive organs as that gets very messy. It's important to carefully cut out the bladder first, because you don't want any urine to contaminate the meat. Right at the top of the stomach cut (between the hind legs) you'll find the bulbous bladder, and you must take hold of it carefully at the top, while you cut it loose, and drop it in the wheelbarrow/tub carefully. I barely even use a knife for the rest of the gutting, because most of the guts will just fall out with a little persuasion and the rest can usually be pulled out by hand. You'll usually have to strongly tug on the windpipe to pull it out.


    Cutting up the meat: After the gutting is done, I get some help to carry the carcass into the house where we lay it on the table (any large, flat surface; a chest freezer in our basement is my favorite place) on top of a clean sheet and start cutting it up for the freezer. I separate the legs from the body, and then cut each leg again at the middle joint so the pieces will fit into large freezer bags. Some people wrap the meat in freezer paper; I just use large freezer bags. I then cut out the backstrap and the neck meat and any other pieces that there are and bag them up. You can grind and make sausage out of any of it. My family likes the leg roasts the best.


    Now all that's left to do is clean up the mess. I'm sure there are more sophisticated methods of butchering, but this is the way I do it and it works for me. I hope it may come in handy for you. I do not fatten or "feed out" my butcher wethers/bucklings. They have protein blocks, fresh water, and lots of browse or hay if it is winter. They might get a small amount of grain if they are in with my does. The meat is tender and flavorful. Feeding out a goat on grain is not needed, in my opinion, if the goat is in good health and has plenty of good hay or browse, but whether to fatten your goat before butchering is simply your choice. It's your goat, it's your choice. If I butcher them younger than five months, I just pull them straight off of their dams.


    Two tips to make this job easier: 1) If your going to haul the hide and guts off very far (I dump them on the back side of our 100 acre property), instead of using a wheelbarrow to hold the guts, I use a 30-gallon round tin tub with handles on either side. When I am finished butchering for the day, one or two people can lift that tub into the back of the pick-up and I can haul it off and dump it myself. If you have just a short way to go, a wheelbarrow may work better. 2) When you slide the t-post through the slits in the hind legs, prior to hanging the carcass, position the post so that the knobs on the post are toward the goat's back. That way you can pull the goat's legs farther apart and the t-post knobs will hold the carcass in the desired position. The farther apart the legs are held, the easier it is to skin and gut.>>>
    __________________
    Emily Dixon
    Ozark Jewels
    Dairy and Meat Goats
    http://www.freewebs.com/ozarkjewels/

    Also Morningland Dairy Raw Milk Cheeses.
    www.morninglanddairy.com
    Reply With Quote Multi-Quote This Message Quick reply to this message
    #2 Report Post
    Old 03/25/06, 12:51 PM
    ozark_jewels's Avatar
    Join Date: Oct 2005
    Location: Missouri
    Posts: 6,128
    When I posted this the first time, I had someone(either here, or in the goat section, I can't remember which so I'll post it both places) ask for photos specifically of the cutting around the anus area. I butchered three wethers yesterday and my sister Sarah took those pictures for me. Here they are:

    Skin to this point:


    Then this. You can see the anal canal:


    Cut through like this:


    It should look like this after cutting through the anal canal:


    After cutting through the tail and everything.


    You pull the anal canal out through the stomach slit when you gut the animal.
    Hope this helps.

No comments:

Post a Comment

Followers