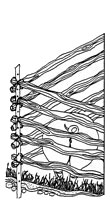
Stovepipe maitenance
The season is arriving. The garden is ready for its final turning, the apples are picked, and it’s supposed to freeze by the end of the week. So, how is your creosote level? Not your cholesterol, your creosote. It builds up on the inside of your chimney and stove pipe, not your veins, but it could cause similar problems.
Tap your stove pipe. Are you answered with a sharp ping or a thud? If it is the latter, you have a creosote problem.
Creosote is the black substance, usually dry and flaky, but in some cases liquid or goopy, that collects on the lining of the chimney or stove pipe, restricting the diameter of the flue. This decreases the draft and reduces the heat flow out of the stove pipe by insulating the walls so that not enough heat is absorbed or transferred through the pipe. If the flames and gases reach a temperature of 1000°, the creosote will ignite, causing a chimney fire.
Creosote is formed from the condensation of organic vapors, tar acids, and water which escape when full combustion is not achieved. The magnitude of the deposit depends on the density of the smoke and fumes and the surface temperature of the stove pipe or chimney on which the vapors are condensing.
There is no way to really avoid the problem, only decrease it. All wood has some moisture, and at some point all fires cool down. This combination of moisture and the cooling process produces the gases which form the creosote. The only way to combat the problem is to control the flaky black adversary with proper use and cleaning of the stove.
The best way to decrease creosote buildup is to keep the temperature of the stovepipe and chimney hot. Creosote does not begin to form until the surface temperature drops to 250° or below. Make the fire burn hot after the fire box has been reloaded. Do not burn large un-split logs, as these reduce the amount of air circulation necessary to facilitate complete combustion and allows more gases and tar to escape from the slow-burning log. Never extinguish a fire quickly. The quick cooling process emits large amounts of unwanted gases and water.
Green wood is especially dangerous to any creosote already in the lining of the pipe. This is especially true of green softwood, because it pops and explodes, sending sparks in every direction. The sparks could easily lodge in the uneven terrain and ignite.
Chimneys and stovepipes should be cleaned at least twice during the burning season (more frequently if the heat source is used year-round). A good way to estimate is to clean after every two to three cords of wood.
Do not use your stove as a trash incinerator. Plastics emit an exceedingly corrosive acid, which will magnify any existing creosote problem. Because creosote is such an excellent insulator (more effective than asbes-tos), a very thin layer can reduce the efficiency of your stove by 10 to 15%. Dampers are big collectors of creosote. Like any variety of debris, creosote collects on any type of angle or protrusion where the exhaust gases are slowed down. Therefore, vertical stovepipes collect less creosote than a pipe with a number of angles or elbows, because the gases can move at a brisker pace.
There are products on the market which claim to keep the chimney free of creosote, but they do not clean existing creosote off of the interior. The cleaning needs to be done either by a chimney sweep or by you, using similar methods.
If you don’t believe the extremely combustible nature of creosote, try burning a few flakes and see how they almost explode into flame.
A chimney fire sounds something like a locomotive roaring through the next room, accompanied by shooting and exploding flames. The heat of a creosote fire can be so intense that it can actually extricate the mortar from between the stones or bricks and send the heat-filled particles crashing onto the roof.
If you have a chimney fire, call the fire department. If possible, close the damper. Any attempt to put out the fire should be done with an abundance of rock salt or baking soda, but never with water. Water would simply intensify the problem, creating more steam and gas and possibly cracking the chimney liners or the cast iron body of the stove and pipes.
Keeping your stove free from creosote will give you a more efficient and safer burning season, so after the stove has been properly cleaned you can relax and worry about your cholesterol level instead.
Slaughtering and Butchering
Fall is butchering time, a period of joy in the harvest of the year’s work and of sadness that the lives of your beautiful, healthy animals have come to an end. On this occasion the animals should be treated with the same kindness and respect with which they were treated during their lives. Good farmers raise their animals free from fear, anxiety and stress. The animals should meet their end as they lived, without the terror of the slaughterhouse.
Making careful preparations will help you remain calm. After years and years of butchering I still feel a strong adrenaline rush when the animal is killed. Be prepared for that and use it to make sure the death is as painless as possible. A knowledgeable person can direct these strong feelings into doing the job right instead of letting their emotions get the best of them and botching the job. When the temperature only reaches 40° during the day and the pasture is no longer adequate feed, it is time to butcher. Sheep and goats should be nine months or under. Pigs should be just slightly jowly.
Past wisdom dictated that 250 pounds was optimum butchering weight for a pig, but after your porkers reach 225, the ratio of weight gain going to fat versus lean meat increases dramatically. After many years of experimentation, I try for 200 pounds. At that point my pigs have no more of a fat covering than my goats. There’s still enough fat for lard and sausage, but there’s no reason to pour more and more feed into them only to find their kidneys so imbedded in fat that they’re hard to locate. I buy my pigs in early May and by mid-November they are eating so voraciously that I know it can no longer be practical to keep them.
 Figure 1. Cutting around the foot. Figure 1. Cutting around the foot. |
Calves are traditionally kept until they are 10-15 months old, but that can be a problem for a family raising their own meat. If the calf was born in February it could be butchered in December. In a place like Montana, however, December is late for butchering. With the temperatures around 0°, your meat would have to hang a very long time to age.
If you decided to keep the calf till spring, you would be faced with deciding whether to butcher it after feeding all winter or to let it grow some on the pasture.
By the time the calf is looking really big, it’s midsummer. In a cool climate you could butcher it then if you did it fast, but you would have to pay someone to hang it to age. In most climates, you don’t butcher between May and October anyway, if you can help it, because of the fly problem. So then you’re up to fall when you have all the other butchering to do. If you can manage it, I think that is your best option.
Here are a few additional suggestions to think about ahead of time. Butchering pigs and cows is easier if you withhold food for 24 hours before butchering. This is not totally necessary, and if you would feel bad having your animal hungry on its last day, don’t do it. Just be extra careful with the guts.
When you butcher only certain members of a herd, avoid frightening the others. Don’t run through the herd chasing the one you want. Move slowly and calmly. Try not to kill one animal in front of the others. Don’t slaughter in the animal’s home.
 Figure 2. Cutting down the body. Figure 2. Cutting down the body. |
The exception to this is when you are slaughtering pigs. Swine do not care if you kill their companion and will rush over to drink the blood if they can.
It makes sense to leave the pig butchering until last so that they can consume anything that is left over. Don’t feed surplus fat to pigs, though. Only poultry can convert fat into useable production calories. That is because of their high rate of metabolism. If you feed fat to pigs, it will provide calories, but it can only become fat, not meat.
Before butchering, decide what parts you will save. I think I’ve tried saving just about everything, and I think there’s some value in that. However, if no one wants to eat it, the value is only in learning and experimenting and knowing the possibilities.
There is a certain satisfaction in using everything. Ears and tail can flavor a pot of beans. Hooves can make gelatin. Stomachs can hold blood sausage and other things. Lungs are edible. Intestines can be used to make sausage casings or cooked in some other additional dishes. I will describe what I keep, but feel free to make your own decisions about what you and your family would like to try.
A word about using the intestines for sausage. If the situation is such that you have running water in a hose, it is fairly easy to clean them. Otherwise you’ll have to do it indoors, which is a lot of work. After that you have to turn them inside out and scrape them.
If you don’t scrape them, they’ll still be edible but they’ll be tougher than you might like. These days I feed the intestines to the animals and buy prepared ones. If you buy them from a butcher house, they’re already prepared and quite inexpensive. Try not to buy them in the grocery store, as they demand ridiculous prices.
Be sure to save enough fat for lard, sausage making, and if you’re butchering a cow, for ground beef.
A goat is shot in the back of the head. The front is too hard. With a cow or a pig, mentally draw lines from the top of each ear to the opposite eye. Where the lines cross is where you shoot. One shot with a .22 should do it.
 Figure 3. Skinning from the center. Figure 3. Skinning from the center. |
We shoot pigs in their pen. That is the least traumatic for everyone. If you do this, though, you’ll want to get the pig out of the pen as quickly as possible so as to slit the throat on clean ground. Throw a noose around its neck and drag it out. You want to slit the throat while the heart is still beating in order to get all the blood pumped out.
Stick the point of your big knife into the throat and cut outward through the skin. Never try to cut into the skin through the hair. Make sure you’ve severed the main veins and arteries.
Any male animal that is to be used as food should have been castrated. If that wasn’t done, however, remove the head and testicles right away. That’s easy with a goat, but a cow or pig can kick with a real wallop, so be careful. This is done so the meat won’t be tainted.
If you are butchering a pig, you will want to wash it down now. A pig is a clean animal in a natural environment but gets pretty dirty when confined. Be especially careful in cleaning the rear feet, for they’ll stay on unskinned.
Remove the head by cutting all the way around with your big knife. As always, avoid cutting into the hair. Instead keep your knife between the flesh and the skin and cut out. With a goat, twist the head until the bone snaps. With a pig or cow, use your meat saw.
Make slits between the achilles tendon and the ankles and insert the gambrel. At this point, you could scald a pig but in these days of preserving meat by freezing, there’s really no point. In days past, the skin was left on the bacon and hams to protect them. It’s traditional, but there’s no other reason to leave it on since we don’t eat it anyway. And logistically it’s just much simpler to skin. Remove front feet at the joint. Using a pulley for a goat and a come-along for a pig or cow, hoist the animal into the air to a height convenient for working on the rear of the animal.
Slip your short pointed knife (Figure 1) into the slit you made at the achilles tendon and cut around the foot, again cutting out, not in. Be very careful not to cut the tendon. With the knife between the flesh and the skin, slice a line through the skin down each leg to the centerline. Then cut down the body to the neck (Figure 2).
 Figure 4. Skinning the foreleg. Figure 4. Skinning the foreleg. |
Now take your skinning knife and begin skinning at the junction where the leg cuts meet the centerline. Hold the skin with one hand or your hook and pull hard to create tension as you use your knife to separate the flesh from the skin. Work out from the center (Figure 3).
If you are not going to use the hide, you won’t have to worry about keeping it intact. Just be concerned about the meat in that case. You’ll have to be much more careful if you want to use the hide.
Keep pulling the skin away with your hand or the hook and continue to slice between the hide and the flesh until the belly is skinned. This will relieve the tension of the skin on the rump. Now work around the leg from front to back.
The next step is to start at the top of the “Y” and skin up and over the crotch. The skin is tightest here, so be especially careful if you’re saving the hide. Pull skin out and down to create tension on your work while you slice with your knife. A layer of fat makes the animal relatively easy to skin. Leave as much fat on the body as possible.
Work over the anus to the tailbone. Give the tail a sharp jerk and it will separate from the vertebrae. From here on, the weight of the skin practically skins the animal for you. Work all around the body. If there is too much movement on the gambrel, lean against the animal.
Raise the beast when it becomes difficult to reach your work. Bring the work to you and stay comfortable. The forelegs are a bit difficult near the shoulders. Start on the outside of the leg (Figure 4). Work around to the front. Skin the neck and the inner forelegs and shed the skin.
Lower the animal so that you can comfortably work on the rear of it. At this point you want to separate the large intestine from the body. You will begin by cutting around the anus with your short pointed knife. Be careful not to make any holes in the intestine. When it is cut free, pull it slightly out and tie it off. It is helpful to have a partner here. This step (tying) is unnecessary if you are butchering a goat.
 Figure 5. Cutting down the belly. Figure 5. Cutting down the belly. |
Cut down the belly with your pointed knife. Cut from inside out as before. With your other hand hold the guts away from the point of the knife (Figure 5). Cut through the belly fat all the way down to the sternum. Next, cut the meat between the legs.
If the animal is a male, cut out the penis. Place a large container underneath to catch the guts. By now they will be bulging out of the body. At some point if you are butchering a ruminant, there may be a flow of greenish liquid from the neck. This is just the cud and nothing to worry about.
Cut through the fat surrounding the guts, then sever any tissue connecting them to the rear wall of the body cavity. Pull the anus through to the inside and then out. Separating the intestines from the body is tedious, so take your time. You don’t want to spill the contents into the meat.
Be careful also not to rupture the bladder. Some people tie it and then cut it off, but I’ve found that method to be more likely to cause spillage.
Pull the intestines and bladder out of the body. Most of the stomach will also be free now. You will need to reach in and under to lift it all over the sternum. Some people cut through the sternum, but it’s easy enough just to lift the guts out. Most everything will now be hanging out of the body. Strip away as much of the surrounding belly fat as you can to feed to the chickens. Get out the bowl for the innards you want to keep. Remove the kidneys and fat. Cut out the liver and put it into the keeper bowl along with the kidneys. Sever the remaining flesh connecting the stomachs to the body, and it should all fall into the gut bucket.
 Figure 6. A goat ready to cut up. Figure 6. A goat ready to cut up. |
Cut out the diaphragm and remove the lungs and heart by severing the connective tissue behind them. Separate the heart from the lungs and squeeze out the blood from the heart. The heart is a keeper, while the lungs aren’t.
From the neck end, cut out the windpipe. Be sure the opening is clear all the way through the body cavity. Clean all over with cold water. (Now you see that if you hadn’t cleaned those rear feet of a pig, the dirt from them could contaminate the meat.)
Except for pork, we age all our meat from fowl to cow, and strongly advise you to do the same. Pork should only hang overnight to chill, and all meat should be cut up in a chilled state. A goat should age one week in 40° weather, longer in colder weather. If it’s too warm to age it, it’s a real shame to butcher at that time, because the meat won’t be as tender as it could be. A goat is hung whole.
To halve a larger carcass, face the belly while your partner helps hold the body and helps to guide the saw from the back when necessary. Use your fingertips on the blade to guide your cut. A cow should be quartered for ease of handling, of course, but also to allow the meat to cool as quickly as possible. Merely cut between the 2nd and 3rd ribs and be ready to hold the fore section. It should be hung for two weeks under the proper conditions.
When you’re finished working on the animal’s body, it’s time to salvage the tongue and brains from the head. The easiest way to get the tongue is to cut under the jaw in the soft space in the middle. When you have slit this open, reach in and cut the tongue loose from its mooring. Working through the mouth is much harder.
Chopping the skull with an axe works for getting out the brains, but sawing it in half with your meat saw gets the job done with a bit more finesse. If you plan to use the rest of the head, you will have to skin it now. Remove the ears, eyes, nose and anything that doesn’t look like meat or bone. Clean thoroughly. You may want to brush the teeth. You could make goat’s head soup or you could make headcheese. The only heads I use these days are pigs.
Some people use the jowls for bacon, but if you’ve butchered before the pig has gotten really fat, there won’t be much there. I use the head meat for scrapple, tamale meat and pozole. I used to use some in liverwurst, but we prefer these other dishes.
In any case, you’ll need a pot large enough to hold the head. If you cook with a wood stove as I do, just add water to cover, put a lid on and leave it on the stove to simmer until the meat is tender. It’s less convenient if you use some other kind of fuel.
 Figure 7. Separating the rear third of a pig. Figure 7. Separating the rear third of a pig. |
Remove the meat and bones from the pot and separate them. Take out anything that looks strange and you’re ready to use whatever recipes you’ve decided on. Boil down your broth to a manageable amount and either use it in your recipes or freeze it for later use.
When you are ready to cut up your meat, refer to the section that applies to your animal. Cutting up a deer or a sheep is the same as a goat.
Cutting up a goat
Cut behind the shoulder blades to remove the front legs. Cut off leg at elbow. These lower legs can be soup bones, but they’re not much good for anything else. You can package the shoulder as it is or you can bone it, roll and tie for a rolled roast. You could also cut it up for stew meat. Take as much meat from the neck as you can. Use that for soup.
You could cut chops if you wanted. You would have to saw through the backbone between every rib to do that. You could bone out the chops to avoid all the sawing. Or you could just cut out the whole muscle bundle along the backbone. It’s called the backscrap and is the best meat on the animal (that’s what I do).
 Figure 8. Separating the front third of a pig. Figure 8. Separating the front third of a pig. |
Next take your meat saw and cut the ribs from the backbone. Then cut them in half with your knife for easy packaging. Underneath the backbone is the tenderloin. Cut that out.
Now for the rear third. Cut off the foot. Next cut off the leg at the knee. These are your shanks. Separate the legs at the pelvis. These are the only roasts I keep from a goat. I use the front shoulders for stew or stir fry. You can package the leg as it is or bone it. Boning saves a lot of space and a rolled roast is a pleasure to cut when it’s cooked, too.
That’s it except for working over all the bones to retrieve any last bits of meat for your sausage bucket. I save one goat just for sausage and one for jerky. You may want to do that, or you may have other favorite uses. Goat meat (or chevon as it’s called) is really wonderful when it’s properly handled.
Cutting up a pig
There are many ways to cut up a pig and many ways to cure meat. I’m going to tell you how I do it and why I use this method. If you’re doing your own curing, you have the vagaries of weather to contend with. Below freezing and it doesn’t cure. Fifty degrees and it spoils.
In my first experiments I used an old fashioned cure. It was very salty. The hams and bacon hung in a cool room all year and didn’t spoil. If you don’t have a freezer, you could do that.
You can use a dry cure or a brine cure. In the brine cure, the strength of the brine is det ermined by the amount of meat. Theoretically it can’t get too salty that way, and I have found that to be true.
If you butcher when it’s 40°, and then it warms up to the 50s, then it freezes for a while, then warms up to 50° again, there’s a real danger that your meat will sour around the bone. By the time it’s in the warm smokehouse, you’ve really got trouble. For this reason I bone the hams. I have never had a problem since I began doing this. Also it makes the ham nice to cut when it’s rolled and tied.
 Figure 9. Separating the ribs from the chops. Figure 9. Separating the ribs from the chops. |
Your pig should have hung overnight so that the meat is firm. Now you will want to cut your side of pork into thirds. To do this take your meat saw and cut straight down from the backbone through the aitch bone to separate the rear ham from the body. (Blue tape, Figure 7.) The cut should go right through the ball and socket joint. Remove the foot.
To separate the front third, cut between the second and third ribs again cutting straight down from the backbone. (Blue tape, Figure 8.) Look carefully at the muscle bundles and try to keep them intact.
Take the middle section and make another cut after the 11th rib. Then cut across the ribs parallel to the backbone to separate the ribs from the chops. (Blue tape, Figure 9.) Look at both ends of the meat to see where to cut. Remove the belly fat and save it for sausage and lard.
Saw through the backbone for chops and finish your cuts with a knife. It’s helpful to have a partner to hold it steady. Trim off the extra fat but as always, leave some.
Now trim out the loin. Feel the bone with your fingers and just cut out the muscle bundle as well as you can. This is your best roast. Cut it into whatever size you want (Figure 10).
 Figure 10. Rolled poark roasts and the bone they came from. Figure 10. Rolled poark roasts and the bone they came from. |
Trim the excess fat from the ribs. Decide whether you want extra meaty ribs or if you want to slice off most of the meat for bacon. Cut the bacon from the ribs (Figure 11). Cut the ribs into easily packaged pieces, but leave the bacon whole until after smoking (Figure 12).
Before cutting your hams, you’ll have to decide whether you want them large or small and how much meat you want for sausage, stir fry, etc. Cutting hams and roasts takes some practice, but don’t worry too much. They can always be trimmed to look nice and nothing is wasted. It can always go into the sausage bucket.
Begin two piles of trimmings. One will be for sausage and the other will be better pieces for stir fry. Take the front third and cut off the hock. If you wanted to make this a shoulder roast you could, but the meat is very fatty and not as good quality as the rear. It could also be used for sausage or stir fry. When you make your roasts, study the muscle bundles and try to keep them intact as much as possible. To bone, cut to the bone and cut around it as well as possible and along the backbone to the third rib. Cut off the front muscle bundle and put it into the sausage bucket. Roll it up as it would be with the bone in and trim it to look nice. Trim off excess fat.
Take the rear third and decide how much hock you want and cut that off. Bone out the rear hams and trim off excess fat. This is tedious, so just take your time. Make your cut in to the bone and cut it out as well as possible. Trim end for looks (Figure 13).
 Figure 11. The bacon separated from the ribs. Figure 11. The bacon separated from the ribs. |
Put your bacon, hams and hocks into the curing bucket. Be sure to save enough fat for sausage and lard, and you’re finished with this part.
Cutting up a cow
Begin with the hind quarter. Cut off the leg by making a cut with the meat saw from the hip to the tailbone. If you cut across the top, you will have round steaks. The first cuts are top round and are the best. Thicker cuts make round roasts. The small, less meaty part near the shank is the heel of round. The shank is a soup bone.
The muscle flap on the belly is the flank steak. Cut that off and remove the layers of fat. The rump roast is the meaty end that was cut away from the leg. Bone it out for a rump roast or just cut it off with the saw.
 Figure 12. A pig cut up but not yet boned (front) Figure 12. A pig cut up but not yet boned (front) |
The top muscle on the remaining piece is all steak. You could cut through the backbone for each steak or bone it out and then cut into steaks. Or the part behind the ribs could be left whole for a sirloin roast. The meat underneath the backbone is the tenderloin or filet mignon which can be removed and cut into steaks (butterfly) or left whole.
Your steaks, beginning at the rear just ahead of the rump roast and moving forward, are sirloin, porterhouse, T-bone, if boned, separate into the filet mignon and New York strip. The rib steaks could be left whole for a rib roast, which would be your best roast. Everything left on this quarter is stew or burger. Stew meat is the better meat. Remove the fat and anything un-meatlike.
Now we’re ready for the front quarter. To remove the leg, lift it up and start cutting underneath until you have cut behind the shoulder blade and separated the leg from the body. The part on the shoulder is called a blade roast. It can be boned or just cut with the saw to the size you prefer. The top part of the leg is chuck and can be made into roasts or steaks. It can be boned or not. The lower part of the leg is burger or soup bone. There are probably a couple of rib steaks on the remaining piece, so cut these out. The neck meat is stew. The meat at the front that would have been just behind the leg is brisket. Remove that from its bone.
 Figure 13. Roasts, hams, chops, bacon, ribs & sausage trimmings. Figure 13. Roasts, hams, chops, bacon, ribs & sausage trimmings. |
Cut as many ribs as you want for short ribs. Everything else is stew or burger. When making hamburger, use at least one fourth fat.
Curing
Mix the brine before you cut up your pork, so you can just drop it right in. Two five-gallon buckets of food grade plastic works fine for two pigs. The recipe is for 100 lbs. of meat which should also be right for two pigs. Measure out 8 pounds of pickling salt and 2 pounds of sugar, honey, brown sugar or maple syrup. This is the critical part. Dissolve this in water. We add other spices such as cayenne, black pepper, garlic, etc. but this is only for added flavor and not necessary. The use of boiling water aids in dissolution.
Some people add saltpeter (nitrates), but all it does is make the meat a uniform pink, and I prefer not to use this additive. Bacon and hocks will cure in a week at 40°. Hams will take six weeks. For every day below freezing, another day should be added.
Weight the meat so it doesn’t come above the brine, adding more water if necessary. Use a plate with a clean rock on top.
 Figure 14. Cuts of meat from a pig. Figure 14. Cuts of meat from a pig. |
Sausage
Any kind of meat can be used for sausage. Just save whatever scraps you have from cutting up meat. You can use as little as ¼ fat, but the sausage is much, much better if 1/3 is used. Sausage making is one of the most fun of all my projects. But don’t rush through it or it can turn into a nightmare. If you’ve just finished cutting up your pig, give yourself a break and wait until the next day to do the sausage.
I have enclosed several recipes that you might like to try. We like to make many different kinds each year. Whatever you do though, take the time to cook some of each type before you package it or stuff it into casings. It may be too bland or worse too spicy, in which case you’ll have to add more meat.
If sausage is being made from pork, only one grinding will suffice but beef or goat should be ground twice using a coarser grind the first time.
 Figure 15. Cuts of meat from a cow Figure 15. Cuts of meat from a cow |
Some recipes call for water and some don’t, but if you’re making link sausage you will have to add some liquid. Add enough so that the sausage is easy to work.
Smoking
Hardwood must be used for smoking so that the meat doesn’t get resins in it, as it would from pine. When smoking hams, bacon and sausage, you use what is called a cool smoke. This means that the meat is not being cooked while it is being smoked. You can use anything to hold the meat and smoke. We built a smokehouse out of sheets of plywood, which enables us to walk inside to hang the meat.
We use an old woodstove to provide the smoke, which passes from the stove through a stovepipe with damper into the smokehouse. The pipe should go in fairly low, but not so low as to inhibit draw. For an hour or so, leave the door ajar to let excess moisture escape. Then close it and try to keep the temperature around 100°. When it’s done is a judgement call, but we give sausage approximately 12 hours, bacon 14, and hams 48. The color is the key. It should be the color of mahogany.
How to butcher a chicken
in 20 minutes or less...
...while leaving the carcass and feathers intact!
By Dr. Roger W. Grim, D.C. | |
When I was 12 years old Grandpa would let me help him pluck whole chickens after we had dipped them in scalding hot water in a washtub. That was the way he sold whole chickens to stores with his family business.

Figure 1. With a trash bag properly fitted around the chicken, clean up will be easy. |
|
One day I asked Grandpa, “Isn’t there an easier way to dress out a chicken?” He showed me a method with no need to pluck feathers and no smelly stench from a wet chicken. It’s just a fast, easy way to put meat on the table. Things you will need- A sharp knife, axe, meat cleaver, or machetefor cutting off the head.
- Rope. Cut 3 or 4 pieces of ¼-inch rope 12 to 18 inches long. One is to tie the chicken’s legs together tightly before you cut the head off; otherwise you will have a headless chicken running about the yard. The other is to tie the chicken’s legs onto your hook on a tree or cart.
- A bowl. I use a stainless steel one but any large bowl or panwill do. Put your chicken in it once you cut it away from the carcass.

Figure 2. Front view showing where the cuts are made and how the skin is peeled away |
|
- A large bowl of water. Again I use a stainless steel one. It’s to keep my hands and knife clean while skinning the chickens.
- I use two sawhorsesfor a table base, over which I placed a sheet of ¾-inch plywood 24 x 48 inches. If you have a small folding table you could use it.
- A clean sheet of plastic or butcher’s paper big enough to cover your work table top. Tape it on or tuck it under the table top.
- I use my trusty cart, setting it up on end. The handle bar is just the right height for me to hang the chickens from and skin. I put a concrete block in it while I’m pulling the skin downward so the cart will not fall on me.
- A garden hose is handy to clean your knives and to pre-clean the chicken of any dirt or feathers before they are taken into the house for final cleaning and freezing preparation.
- A large black garbage bag with two twist ties that hold the garbage bag on the cart. Cut the garbage bag two-thirds of the way down so that anything you cut off while skinning, such as the feathers and carcass, goes into the bag (Figure 1).

Figure 3. A view showing how to cut away the mini-wing drumstick |
|
The processNow you are ready to butcher and skin the chicken. Tie the chicken’s legs together and cut off its head. Then hang the chicken up by its legs (see Figure 2) with the breast of the chicken facing you. Make the first cut around the yellow part of the leg joint only deep enough to separate the skin, but not deep enough to cut the leg tendon. Cut and pull down the skin from the leg, cutting just deep enough that the skin will come loose from around the meat. Pull the skin of the chicken down laterally to each side, all the time cutting away the other skin to reveal the leg meat that you will cut off later. 
Figure 4. The skinned carcass, ready for you to take the meat |
|
Continue to cut and pull the skin all the way down and backwards around the upper thigh. Continue to cut and pull the skin down around the breast and cut the wing loose at the first joint of the wing (Figure 3). Some people may want to continue to clean and cut around the feathers of the wing for the small tip of the wing bones, but for me there is so little meat it is not worth it. It’s as easy as 1, 2, 3Now we are ready to strip the skinned carcass (Figure 4). First, cut the wings, or mini-drumsticks, off at the joint near the breast. By forcing them backwards and cutting as close to the breast and joint as possible, you will expose the wing joint and you can cut through and around it. Next, cut the breast out. Lay your knife at an angle, starting the cut as close to the breastbone as possible. Take your knife and stay close to the rib cage while cutting downward and backward in an arcing direction as shown in Figure 5. Repeat the process on the other breast. 
Figure 5. Side view showing where to cut the meat |
|
You are ready to claim the legs and thighs all in one piece. If you want to separate them later you can do so. Go up to the ankle joint at about ¾ to 1 inch above the “leggin’s” (that’s what I call the scaly yellow part above the feet on the chicken), and cut through and around the joint so that each leggin’ and foot falls free. While holding the drumstick and thigh in the left hand, take your right hand and hold the carcass while at the same time pushing the thigh and drumstick backwards. This is like opening a set of French doors. You will both see and hear the thigh joint pop loose from the hip joint. Cut as close to the round point as possible (Figure 5). To separate the thigh from the carcass, make the next and final cut at the back upper part of the thigh, just about 1½ to 2 inches next to the anus. You now have a complete thigh and drumstick. Some folks might say that you are not getting all the meat, that you are leaving the two small bony pieces on the wing tip, the two little scraps of meat on the backbone, the liver, and the neck. I say if you like those parts, go for it. 
Figure 6. The results of a freshly skinned and butchered chicken. |
|
100+ years in our familyWith this method, I have butchered chickens for more than 40 years, just like my grandfather did for 60 years before me. I can remember that Grandma’s chicken fried in a cast iron skillet beat Col. Sanders by a mile. Raising your own stock, whether it be young chicks to fryer size, rabbits, goats, or beef cattle can be a family affair. Children gain knowledge, learn responsibility, and the necessary basics of self-sufficiency.
|
|


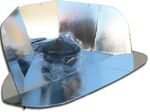
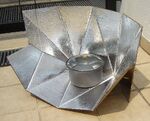


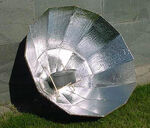

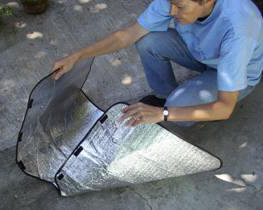 Lay the sunshade out with the notched side toward you, as above.
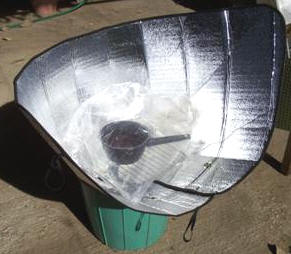 The funnel can be tilted in the direction of the sun.
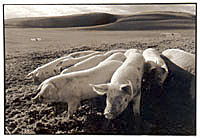
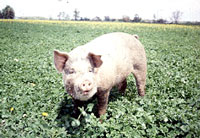
 "You have to raise healthy pigs to make money," he said. "You can't raise healthy pigs on the artificial feeds on the market, and vets just inject lots of medicine when the pigs get sick. I don't want to eat such a pig -- and pigs don't become healthy with the medicines either. There are thousands of anti-fungicides and antibiotics in artificial pig feed. I can't let my pigs eat such stuff! The best food for healthy pigs is healthy soil."